How To Create A Pie Chart In Excel 2013 For Mac
By Charts are a strongpoint in Excel for Mac 2011. Students, businesses, scientists, news organizations, economists, and many other groups use charts. When you make charts in Office 2011 for Mac, you find a brand-new set of Chart tabs on the Ribbon that guide you with the latest Microsoft charting technology.
If you have some data to chart, by all means use it as you go through these examples. Typing in the data was the hard part.
Select the range F6:G10 (Column F for Donut Chart – Zone Settings) and (Column G for Pie Chart – Ticker Settings) The Pie series has 3 data points and the Donut chart series has 4 data points. Go to the Insert Tab on the ribbon and in the Charts Group, click to Create Custom Combo chart icon to create the default chart. Select the data series, click the 'Insert' tab, and then choose the type of chart you want to use from the Charts group. For example, click the down arrow under 'Bar' and click to select a specific type of bar chart.
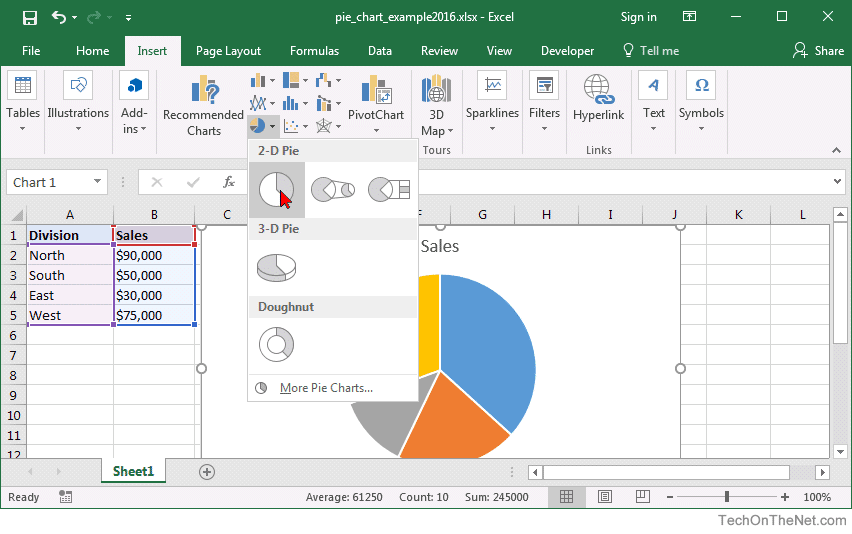
Now for the easy part: making the chart! • Select a cell in the data range. • On the Ribbon’s Charts tab, go to the Insert Chart group and then choose a chart type. A palette displays, showing various subtypes of charts. Choose one you think will display your data well. Excel figures out the boundaries of the data range and instantly displays your chart. To follow with the example, choose Line→2-D Line→Marked Line.
If the chart looks wrong, chances are Excel’s guess about which rows and columns to use for the axis was wrong. It’s a 50-50 proposition. To fix this problem, on the Ribbon’s Charts tab, locate the Data group and choose whichever Switch Plot button is not selected to switch row and column data source. When you select a chart, the Chart menu activates, the data range is highlighted, and you have three extra tabs on the Ribbon to enjoy: Charts, Chart Layout, and Chart Format. You can right-click individual chart elements like series, plot area, legend, and so on to display pop-up menus that lead to more formatting options. If you’re into designing great-looking stuff, welcome home!
By default usually selected the appropriate file. How to Install Printer Drivers • Enter the printer driver CD into the CD-ROOM or if it does not have to download a linked CD Driver downloads are provided in the article below. • Go to the Device Manager (Explorer -> right click Computer -> Manage -> Device Manage) • Select the device Printers, right-click the File Setup -> Update Driver Softwae • Select the second driver search; Browser my computer for driver software • The browser driver search locations, specify by selecting the CD-ROOM which already contains a CD or downloaded file in the link below and then click Next • If the file is found, it will display a description and location. If so, please click Next to continue. Lexmark prevail pro705 driver for mac 10.12.